The satellite trilogy
Before diving into this absolutely true and totally not exaggerated story, let me tell you: this is not your typical adventure. If you’re expecting a typical “how I built a satellite and sent it to space” narrative, you're in for a surprise. Also, quick note: all three links about the CanSat that I might mention here? Yep, they all point to the same page, just at different scroll positions. A true masterpiece of navigation confusion.
The Great CanSat Delusion
It all began many years ago, back when I was still in high school, blissfully ignorant of the complex world of electronics, physics, and project management. One day, I, with the persuasive powers of a snake-oil salesman, managed to convince a group of my equally clueless friends to join me in an ambitious school project: building a satellite.
But not just any satellite. No, no. This one had to fit inside a can. Yes, a literal can, because apparently, engineers just love to make things harder. The goal was to create a satellite that could gather atmospheric data and fit within the confines of a tin can, which would then be launched on a rocket (It was meant to reach 30-40 km of altitude, I remember how excited I was!!). How hard could it be?
Now, let me be clear. At this point in time, we knew next to nothing about satellites. Hell, we barely understood how to use a multimeter. But we were armed with blind confidence, a shiny new 3D printer, and an abundance of YouTube tutorials, so naturally, we thought, "This is going to be easy." Spoiler alert: it wasn’t.
3D Printing Our Way to Madness
The first thing we did was take a look at the kit they gave us: a basic metal frame with a couple of components. Simple, practical, and designed for beginners. So, obviously, we threw all of that out the window and went in the complete opposite direction.
Instead of something straightforward, we created a convoluted two-part design that was more dreams and duct tape than actual science. At the heart of this Frankenstein’s monster was a Raspberry Pi Pico, wired up to various atmospheric sensors we got from Adafruit, which were all mashed together on a custom PCB. And if that wasn’t enough, we decided to throw in a bicopter because, why not? We were inspired by NASA’s Mars helicopter, except, you know, ours had to fit in a can.
Of course, when you realize that you can’t cram a quadcopter, a Pi Pico, batteries, and a bunch of sensors into a can, you do what any sensible high schoolers would do: downgrade it to a bicopter. That’s right, instead of four rotors, we went with two, because we believed in minimalism, or maybe just didn’t know any better.
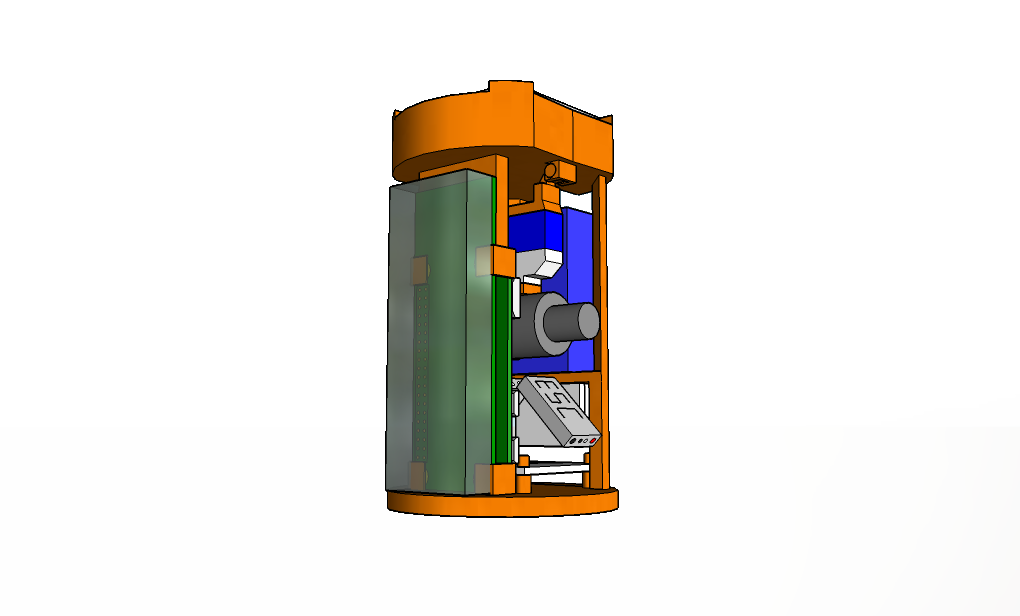
Somehow, despite all the questionable design choices, we actually managed to make everything fit inside the can. But let me tell you, it looked like the satellite equivalent of a sad burrito, packed way too tight, and oozing wires from the sides. The Pi Pico Sitting awkwardly upright, looking like it had been shoved in there last minute. On one side, the battery hung precariously, and a tiny solar panel, probably more of a token gesture to renewable energy than an actual power source, was strapped on top. In the center, the bicopter sat, hoping and praying it wouldn’t explode.
On top of all that, we threw in a GPS module, in the parachute compartment (Our confidence on the bicopter was high!), for autonomous operation. (Ha! As if this thing was going anywhere on its own.)
Launch Day (Sort of)
Against all odds, we finished the build and took our fragile satellite burrito to the launch site. No parachutes, no actual flight control, just raw, chaotic optimism. We didn’t win any prizes that day (shocking, I know), but we did manage to collect some atmospheric data and learned some valuable lessons, like:
We didn’t win, but hey, we learned how to melt servos. That’s worth something, right?
Revenge of the CanSat
Now, if you thought that after our first disastrous CanSat attempt, we would have learned the importance of simplicity and common sense, let me just stop you right there. We absolutely did not. In fact, in true overachieving fashion, we decided to go even bigger, bolder, and, spoiler alert, even more complicated.
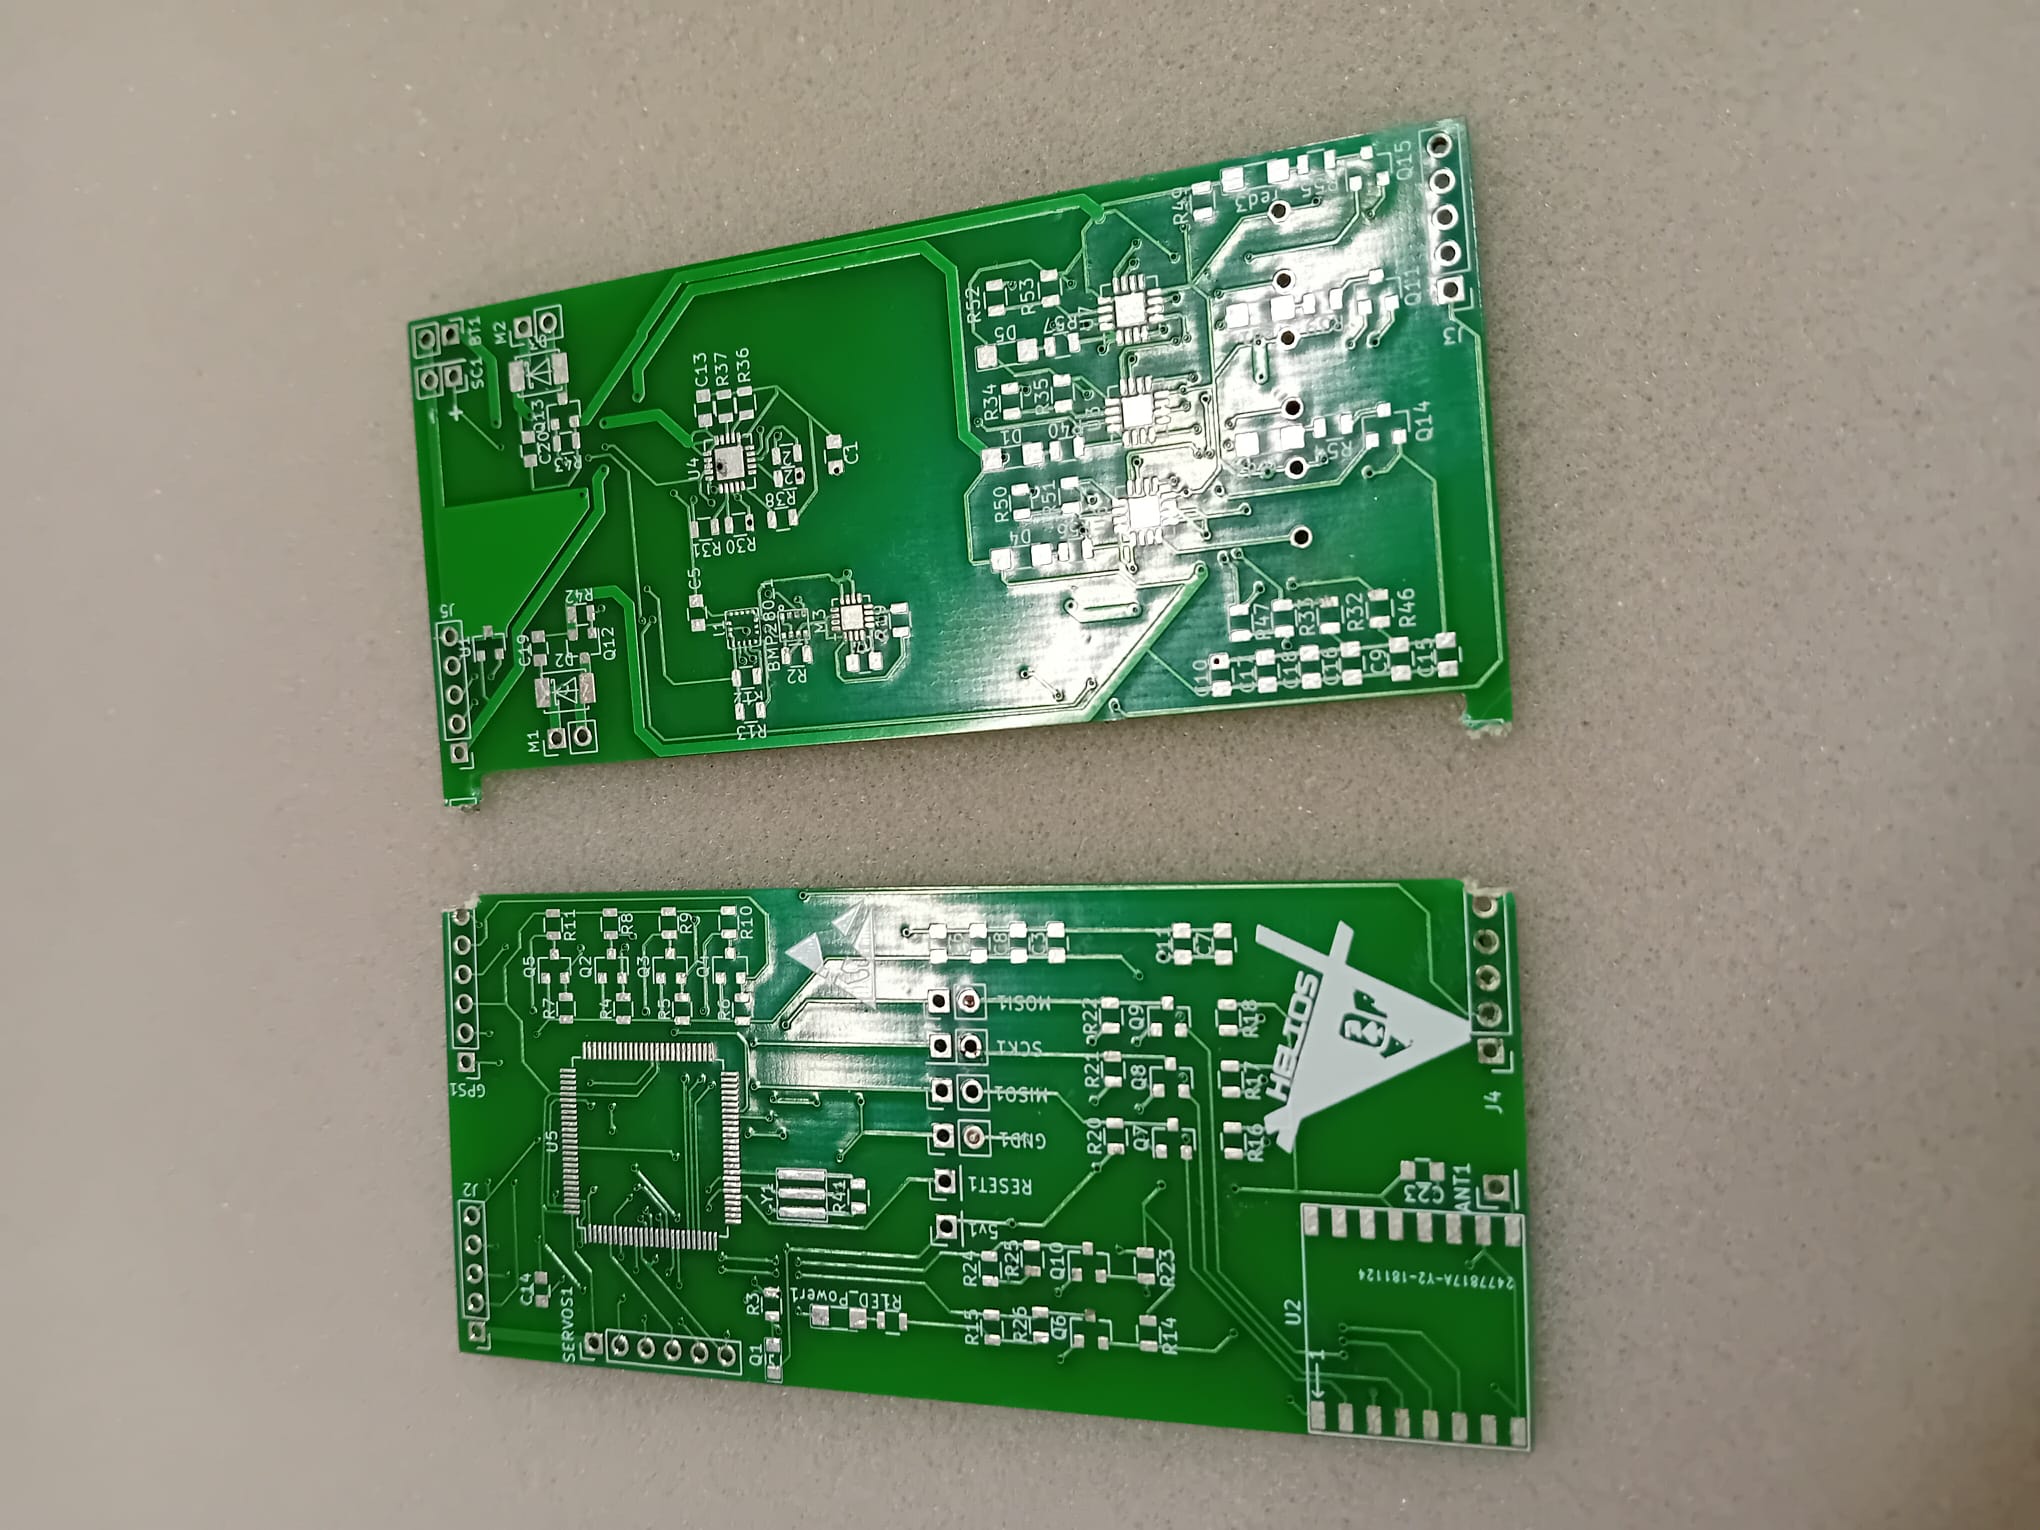
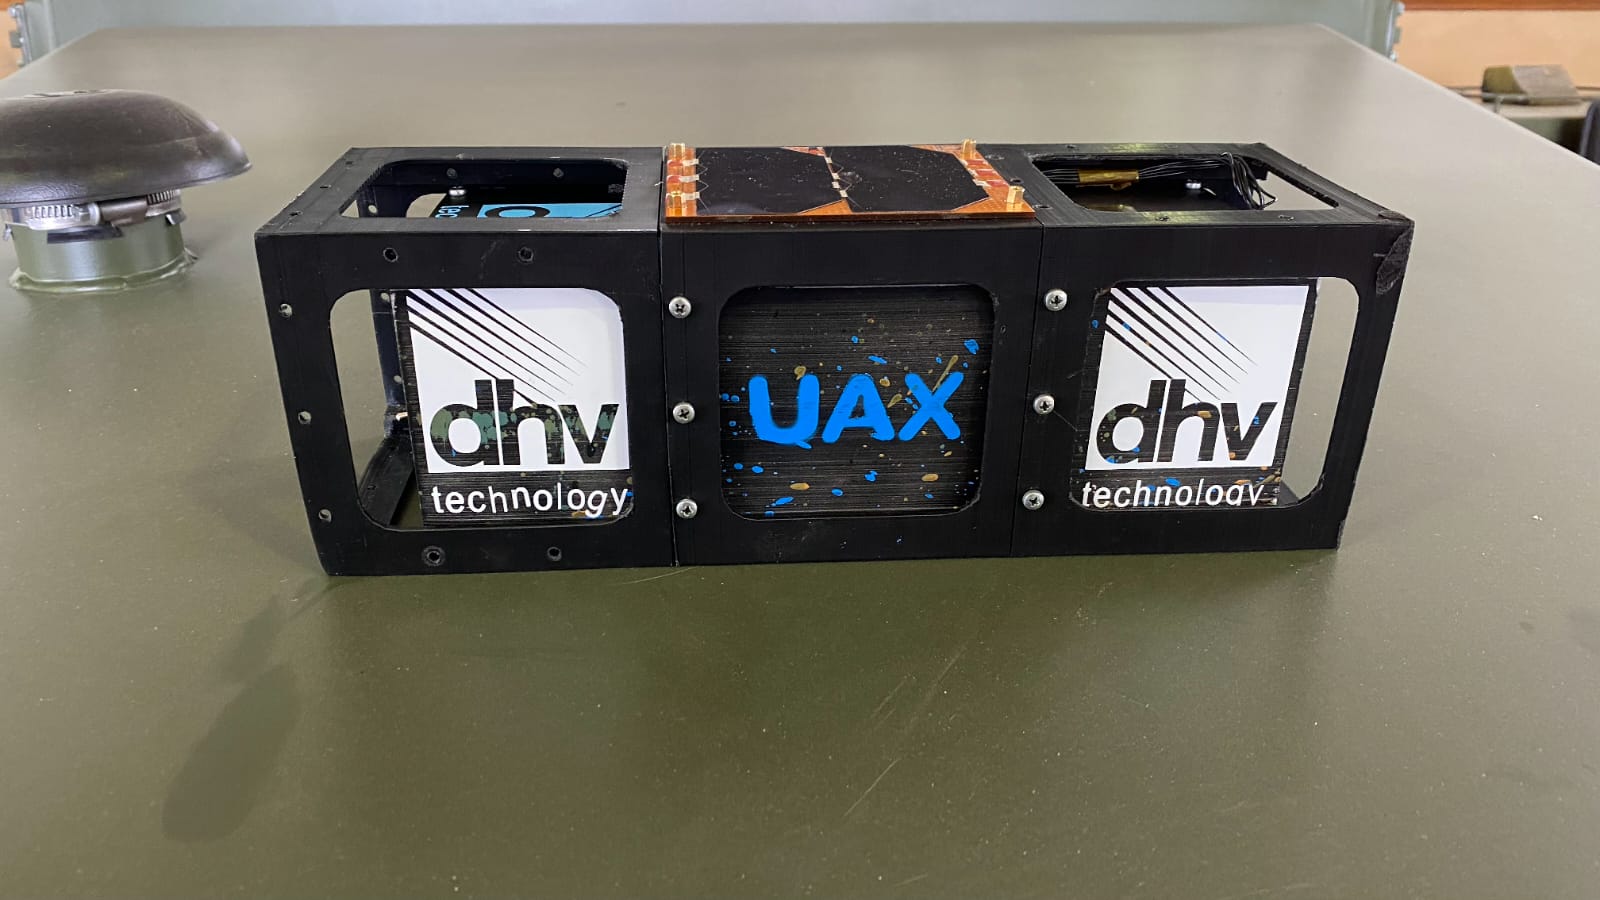
Instead of taking the logical approach of “let’s not make the same mistakes twice,” we dove headfirst into a rabbit hole of complexity. We were absolutely convinced that this time, more was more. We didn’t just want a simple board with a few sensors, we wanted a technological marvel crammed into that same tiny soda can. Our goal? To design the most ridiculously overengineered PCB ever to grace the surface of this planet.
And to make things even more difficult for ourselves, we didn’t just buy off-the-shelf components. No, we had to design the whole PCB from scratch, because why use something tried and tested when you can just give yourself a migraine instead? We spent countless hours poring over schematics from Adafruit, adding them to our growing Frankenstein board. It was like we were trying to fit every sensor in the world onto something the size of a coaster.
This time, we didn’t stop at just making it complicated, oh no, we also made it nearly impossible to assemble. The tiny SMD components were so minuscule, soldering them on felt like trying to thread a needle with a pair of chopsticks. We even had to special-order some parts, because they weren’t available in the quantities we needed. Who needs sleep when you’ve got a soldering iron and a dream, right?
Once again, we miraculously got the thing working. It was ugly. It was overstuffed. But it worked, kind of like a Thanksgiving turkey that’s been overcooked but still technically edible. We were sure that this was our moment of glory. Our shining CanSat was ready to soar to the heavens.
And then... the universe laughed. They didn’t let us compete. Apparently, our overcomplicated masterpiece didn’t get us an automatic entry into the competition, and they didn’t have room for us that year. All that hard work, all that soldering, all that overthinking, for nothing. Well, not nothing. We still had a ridiculously overengineered PCB to show for it.
As we sat there, staring at our creation, we couldn’t help but feel a mix of pride and frustration. Sure, we couldn’t launch it, but damn, it was a beautiful mess of technology.

The Redemption CubeSat
Fast forward a few years. Now in university, one of my old CanSat buddies was studying aerospace engineering. One day, he came to me with an offer: “Hey, want to help build a CubeSat?" (like the Cansat but larger) This was my chance at redemption! Sure, it wasn’t a soda can this time, but close enough.
The project was already well underway by the time I joined, and they had learned the most important lesson from our previous failures: keep it simple. No more crazy designs, no custom parts. This was just off-the-shelf modules, basic structure, and a Raspberry Pi. Easy.
My role was pretty straightforward: fix their ultra-expensive, ultra-efficient solar panel that had a broken IC, work on some leftover Adafruit libraries that someone else had abandoned, and design a custom PCB. Wait, wasn’t the whole point to avoid custom stuff? Well, yeah, but their plan involved hot-gluing a breadboard together. So I convinced them that a proper PCB would save us from becoming the laughing stock of the satellite world.
With our collective knowledge and battle scars from previous CanSat failures, we ran all the tests we should’ve done in high school: thermal mass, battery temperature, and more. July was spent refining the design, and by the end, we were ready for launch. This time, it was a balloon launch (so no crazy G-forces), but we still had to deal with delays. The weather kept pushing our launch day back, day after day, which basically gave us an excuse to have an all-expenses-paid mini-vacation, courtesy of the university.
Sweet Victory
And that, dear friends, is how my satellite-building journey came to a fitting conclusion. Did we finally launch a successful satellite? Yes. Did we win anything? No. But we did get a free vacation, some incredible memories, and a sense of redemption. And honestly, that’s all I ever wanted from the start.
Who knows? Maybe there’s another satellite project in my future. But for now, I’m content with the fact that we learned how to solder, how not to fry servos, and, most importantly, how to make the best of a delayed launch and turn it into a holiday.
Links
huh? Links what is that? Is it edible?